
jump to the instructions using the hosts file • using Pi-hole • some block lists
Have you started to develop an extreme distaste of Big Tech corpos as I have the last several years? I could go on about it but it really boils down to the fact they only ride the current political tide to squeeze as much money out of people as they can and gain as much power and influence as possible.
So, related to recent events, I recently took to deleting my Meta, X, etc. accounts, which is a good first step. However, this is only one part of the puzzle. Companies like Meta and Google have their trackers on so many sites on the internet in order to build up an advertising profile of you, meaning they can make money off of you even if you never explicitly go to their sites!
Therefore, it’s not enough to just delete these accounts – you have to block their domains entirely. I’ve taken the time to do this on my own devices and want to impart this knowledge to anyone else also wanting to abolish these evil corpos from their lives.
The scope of this article will be limited to blocking Meta, X, and TikTok, but the same processes here can easily be done with any company’s domains you want to block.
How do These Methods Work?
Before making this article, I wrote one explaining how domain names work. I recommend reading that first if you want to know how they work and therefore how these methods I’ll go into work. At a high level, for any domains we want to block, these methods will replace the IP address with one that doesn’t lead anywhere. Then, requests for all other domains are then forwarded to an upstream DNS provider.
Caveats
This Only Blocks Domains, Not IP Addresses
One caveat with these methods is that they do not block the underlying IP addresses, so this only really blocks instances where those domain names are being contacted. In practice, this is mostly a non-issue since most websites contact other sites via domain names instead of IP addresses. However, it’s very possible this won’t block traffic within a service’s app, so keep that in mind.
VPNs
Since VPNs route all your traffic through the VPN, this method will not work if you have your device connected to a VPN. There are a couple ways around this if you want to keep using a VPN:
- Many VPN apps will let you use the system DNS resolver, meaning DNS queries will get sent to that instead of the VPN provider. This does mean your ISP will have the chance to snoop in on your DNS queries, so if that’s a concern, this isn’t the best method.
- If it has an option for this, configure your router to connect to a VPN instead of your individual devices. For example, here’s how you do it with Netgear routers. This is better since your DNS requests will be sent over the VPN.
DNS-over-TLS / DNS-over-HTTPS
DoT and DoH are DNS protocols I only found out about as I was putting together this article. These protocols are very similar and have the same goal: to encrypt DNS query traffic. In theory, it seems like a good idea – instead of your DNS queries being sent over the internet entirely unencrypted, where theoretically anyone snooping in on your traffic could find out the sites you’re going to, only the DNS resolver you’re communicating with can see the queries. (This is why Google calls it Private DNS in Android, though it’s not truly private since the DNS resolver still reads your queries and can do whatever they want with that data. And you bet your ass Google is keeping track of all of that.)
However, there is a key difference from standard DNS – as their names indicate, they don’t use the DNS protocol, but rather TLS and HTTPS respectively. Because of this, these protocols break DNS-based filters, because they forward DNS queries to a specific domain name rather than your configured device’s DNS server. You will have to disable this in your browser, which is slowly becoming the default for all browsers out there, and you’ll also have to disable it on your phone if you’re using Android.
- In Firefox, go to Settings → Privacy & Security → DNS over HTTPS and disable it.
- In Chrome, go to Settings → Privacy and security → Security → Use secure DNS and disable it.
- On your Android phone, go to Settings → Network & internet → Private DNS and disable it.
This still doesn’t stop everything though. Some apps such as TikTok will actually ignore your system’s DNS resolver and forward requests to a DNS-over-HTTPS resolver, which is insidious if you ask me. At the end of the article, I am including a blocklist to block DoH domains if you want to eradicate that malicious tactic.
Blocking Domains Using the Hosts File
This method blocks domain names by overriding the domain names’ IP addresses in your computer’s hosts file.
What is the Hosts File?
It’s a file that exists in all OSs that contains mappings of domain names to their IP addresses. As you may guess, it’s actually the precursor to DNS, originally available as a manually maintained file that folks could download to go to websites. It really was the yellow pages of the internet back in the early ’80s, going back to that analogy. Of course, DNS has been well-established for more than 40 years now, so this file is mostly obsolete; the file in most OSs is totally blank or is just comments, as we can see with Windows’ hosts file:
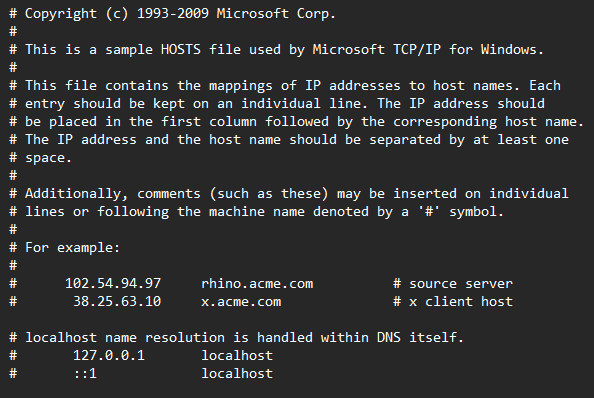
However, it’s still fully functional, and it actually overrides DNS resolving. This means that we can just replace every domain with 0.0.0.0, a bogus IP address that doesn’t lead anywhere, and those domains won’t go anywhere.
This Wikipedia article goes into more detail on the hosts file if you’re curious.
An Additional Caveat
This method has the advantage that it overrides the domain name before your OS even tries to do a DNS query, but it does have a significant drawback that makes it not as effective as using a DNS filter like Pi-hole: you can only specify one domain per line, instead of using a wildcard to cover multiple domains.
What does this mean? You’ve probably noticed that sites can have subdomains; for example, google.com takes you to the Google search engine, but mail.google.com takes you to Gmail. If you wanted to block Google domains, in the hosts file, this means you have to make 2 separate entries for these domains:
|
|
Then you have do to this for every single other subdomain! Now this starts building up, because now you need to add accounts.google.com, calendar.google.com, photos.google.com, analytics.google.com, fonts.google.com… and lots, LOTS more subdomains. This isn’t so bad if you’re using a blocklist someone maintains, but once they add another subdomain, that’s another mole you have to whack.
That said, this method works decently well in certain circumstances, like when you’re out and about on your phone since your local Pi-hole by default isn’t exposed to the public internet (nor should you expose it). It’s also a good option when you can’t set up a Pi-hole server due to not having the money for another device or if you’re not feeling like setting up a Linux server (though I think it’s super valuable and not as hard as you’d think).
The Method
For each domain you want to block, you simply edit the hosts file on your system and add a line like so, saving it afterward:
|
|
This tells the computer that that domain name leads to the IP address 0.0.0.0, which doesn’t lead anywhere.
If you’re using a hosts-based block list, you can simply copy and paste it into the hosts file and it will work. However, many blocklists are provided as just lists of domains, or as AdBlock Plus-style filter lists. To reduce the tedium of manually updating the file to the hosts format, I made a tool to do the conversion that you can run in your browser linked at the end of the article.
For the various major operating systems:
- Windows: open
%WINDIR%\System32\drivers\etc\hostsin Notepad as admin (%WINDIR%is almost alwaysC:\Windowsbut it saves some typing in the file explorer address bar :3) - Linux: open
/etc/hostsin your text editor of choice as admin - macOS: open
/private/etc/hostsas admin; easiest way of doing this is opening Terminal and runningsudo nano /private/etc/hosts(press Ctrl+X to save when done) - Android: you will need to use an app; personalDNSFilter is my choice for this (it also supports domain lists in addition to hosts file lists)
Note on iOS
Sadly, as far as I can tell, there is no free root-less method to do this on iOS. The walled garden that is iOS is the biggest reason why I switched back to Android recently and if you care about being able to customize anything, iPhone is not the phone to use. As such, I don’t have a device to test doing this on iOS.
Some searching leads me to believe there have been various good options over the years that used to offer this option, only to remove it later. And now all the options that can do this are paid :/
Supposedly NextDNS works decently well and isn’t ridiculously overpriced for what it is at $20/year, but I have no ability to test this so YMMV. All that said, not all hope is lost since the Pi-hole method does work with iPhones too.
Once you edit the hosts file, all you need to do is flush the DNS cache and you’re good to go! This may happen automatically but if it doesn’t, it’s most easily achieved by restarting your device, though you can also look up commands to do this without restarting.
Skip to here for some blocklists to get you started.
Blocking Domains Using Pi-hole
Pi-hole is an open source DNS server whose primary intent is to block ads and trackers. It filters out IP addresses for domains that are known to serve ads or trackers while forwarding requests for other domains to an upstream DNS server.
How Do I Set It Up?
I wrote an article on how to set Pi-hole up that goes through setting up your own Pi-hole server. As long as you have Linux installed on some computer you’re ok with running 24/7, it’s fairly easy to set up, and once it is set up, you can configure it entirely within your browser!
Compared to Hosts File
The biggest drawback of the hosts file method is the fact you have to specify every domain to block, without any ability to use wildcards. Pi-hole doesn’t have this problem thankfully, so (for example) you could set a wildcard domain block on google.com and it would block every subdomain they have like calendar.google.com and photos.google.com, without needing to specify all of them.
The Method
Once your device is configured to have the Pi-hole device as its DNS server, you can go to http://pi.hole to configure Pi-hole, including what blocklists it uses.
If you want to add a premade blocklist, go to Adlists in the sidebar, add the URL of the blocklist in the Address field, and click Add. Once you’ve added all the blocklists you want to add, click the gravity list update link and click Update to pull and activate the blocklists.
If you want to block domains, go to Domains in the sidebar, add the domain you want to block, click Add domain as wildcard if you want to exclude all subdomains, and then click Add to Blacklist. Then you’re all set! (You can also go to the RegEx filter tab if you want to use a regex instead – the domain blocks I have set and am sharing are actually regexes.)
Once you’ve added blocklists to your liking, you’re good to go! You may need to flush your devices’ DNS caches if you see blocked domains still going through, in which case you can restart your devices.
Some Block Lists and Domains to Block
Here are some block lists I am using on my Pi-hole if you want to get started! All of these will work under the Adlists tab in Pi-hole.
Note that if you’re blocking these using the hosts file method, you will need to convert these to that hosts file format. For this, I made a tool to do just that – just copy/paste your blocklist in the field, choose which type of list it is, and then click convert!
| List Name | What it Blocks | Type | URL |
|---|---|---|---|
| Steven Black’s list | General ads + malware | Hosts file | https://raw.githubusercontent.com/StevenBlack/hosts/master/hosts |
| EasyList | More ads | Domains list | https://v.firebog.net/hosts/Easylist.txt |
| Phishing Army | Phishing links | Domains list | https://phishing.army/download/phishing_army_blocklist.txt |
| Windows Spy Blocker | Windows telemetry | Hosts file | https://raw.githubusercontent.com/crazy-max/WindowsSpyBlocker/master/data/hosts/spy.txt |
| DOH | DNS-over-HTTPS | ABP blocklist | https://github.com/jpgpi250/piholemanual/raw/refs/heads/master/DOH/DOHadb.txt |
| Bytedance (my list) | TikTok, Toutiao, etc. | Domains list | https://git.sr.ht/~zebyeen/domain-blocklists/blob/main/bytedance.txt |
| Meta (my list) | Facebook, Instagram, etc. | Domains list | https://git.sr.ht/~zebyeen/domain-blocklists/blob/main/meta.txt |
| X (my list) | X / Twitter | Domains List | https://git.sr.ht/~zebyeen/domain-blocklists/blob/main/x.txt |
As mentioned earlier, since these lists all just contain lists of domains, they can’t block everything. Since I wanted to block as much of Bytedance, Meta, and X as possible, I also made some regexes to block as much as possible based on the domains I had gathered. See here if you want to add these regexes yourself.
I hope this was helpful to anyone wanting to cut Big Tech out more from their lives. DM me if you have any questions, I know it’s a lot but it’s definitely worth it in the end! For those curious, here are the stats on my Pi-hole after just 2 days:

Anyway, that’s all! Best of luck in your domain blocking adventures :3