
jump to installation • to setup
If I told myself 10 years ago I’d be able to play brand new Windows games on Linux day one, I would have dismissed it immediately. Yet, this is more often the case than not nowadays, mostly fueled by the resounding success of the Steam Deck. I remember buying the Resident Evil 4 remake the day it released and to my surprise, it ran flawlessly. And I continue to be surprised with what games run on it day one, even many multiplayer games!
I maintain that installing Linux is not as bad as many think and gaming on it is pretty easy too! A lot of it is thanks to Valve’s sheer insistence on using Linux for their devices and their work on Proton, but Proton is based off open source projects like Wine and DXVK that take all that Windows-specific proprietary crap and translate it to the equivalents in Linux. This means that you aren’t limited to just gaming using Steam either!
This guide will go over installing Bazzite, a gaming-focused Linux distro intended to recreate the Steam Deck experience (making it great for a home theater PC experience like what I’m using it for right now), but this works with pretty much any x86 64-bit distro out there as long as you install the relevant programs. So for example, if you installed Xubuntu like in the article I linked in the last paragraph, you can install Steam through the App Center and then use it like you would in Windows (though you will need to go into settings and enable Steam Play compatibility for non-Linux games). You can also install the other tools in this article like Lutris and Emudeck following their guides.
Installing Bazzite
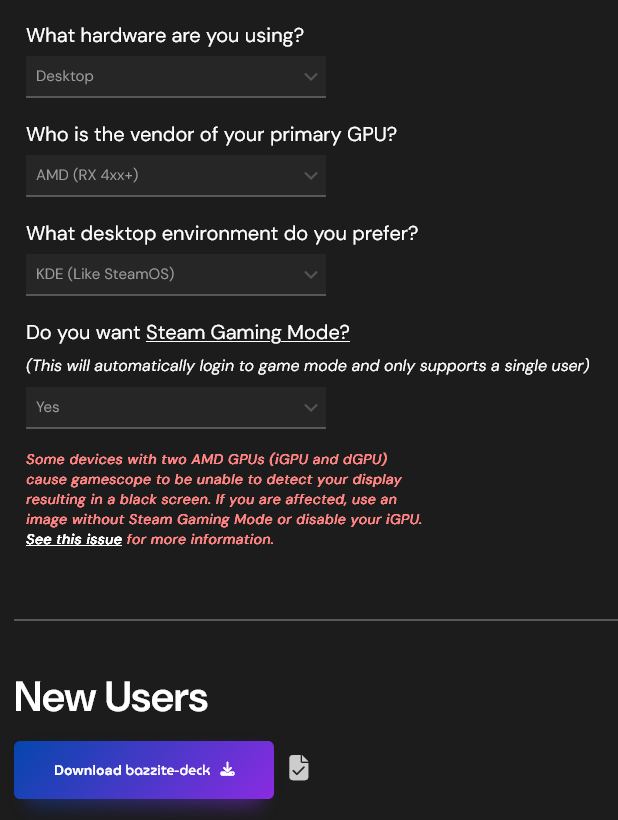
Like Xubuntu, Bazzite uses a graphical installer that makes installation easy even if you’ve never installed a Linux distro before. The first step is to head over to the page for Bazzite and download an iso. Answer the questions it asks and it will give you an iso download link based on what you answered:
The next step is to write the iso onto a thumb drive. Bazzite’s images are large so you will need a 16 GB thumb drive or larger, but besides that you can follow the instructions here to write the installer to the drive, using Rufus. After that, plug a keyboard, mouse, and that thumb drive into the computer you’re installing Bazzite on, turn on the computer, get into the boot options (usually mashing a key like Esc, Delete, or F11), and select the thumb drive.
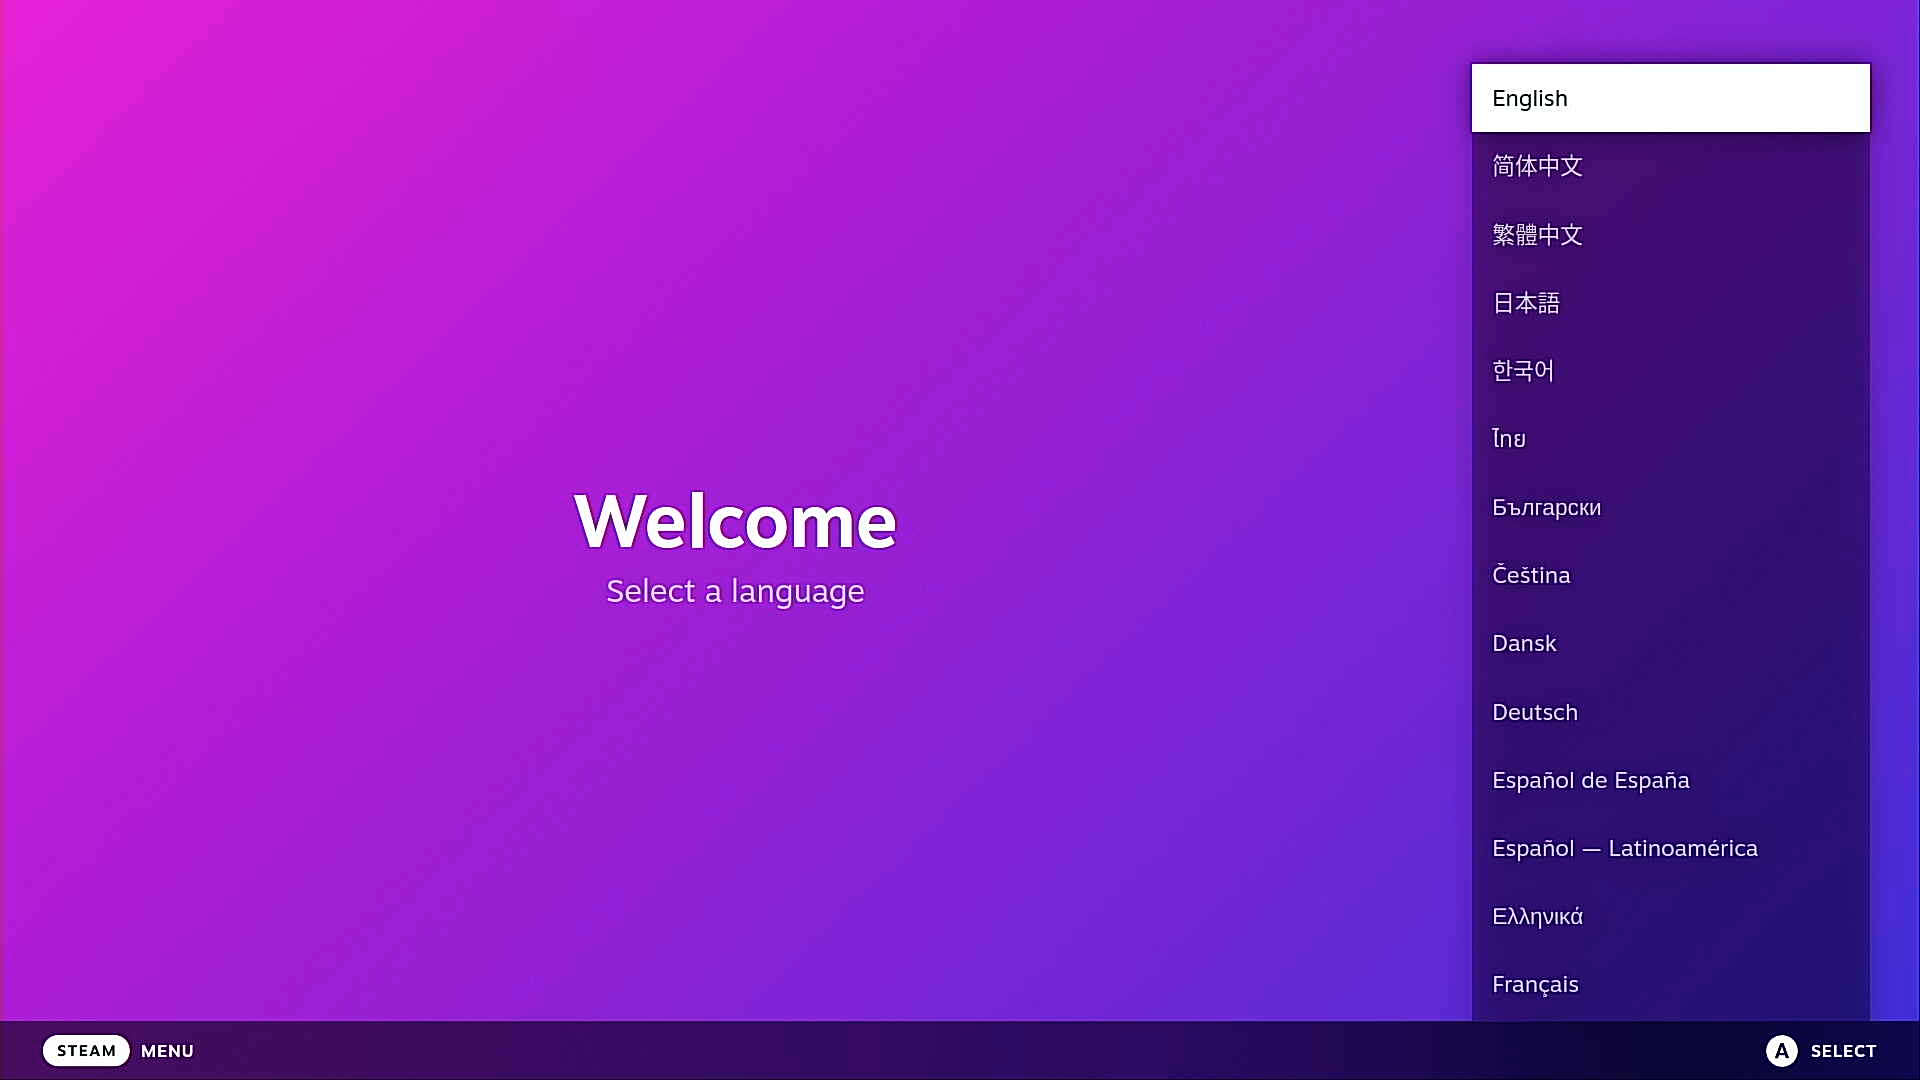
This installer is similar to the Xubuntu installer, but different. Since Bazzite is based off Fedora, it uses Fedora’s installer. Select the language and keyboard layout and then you are greeted to this screen:
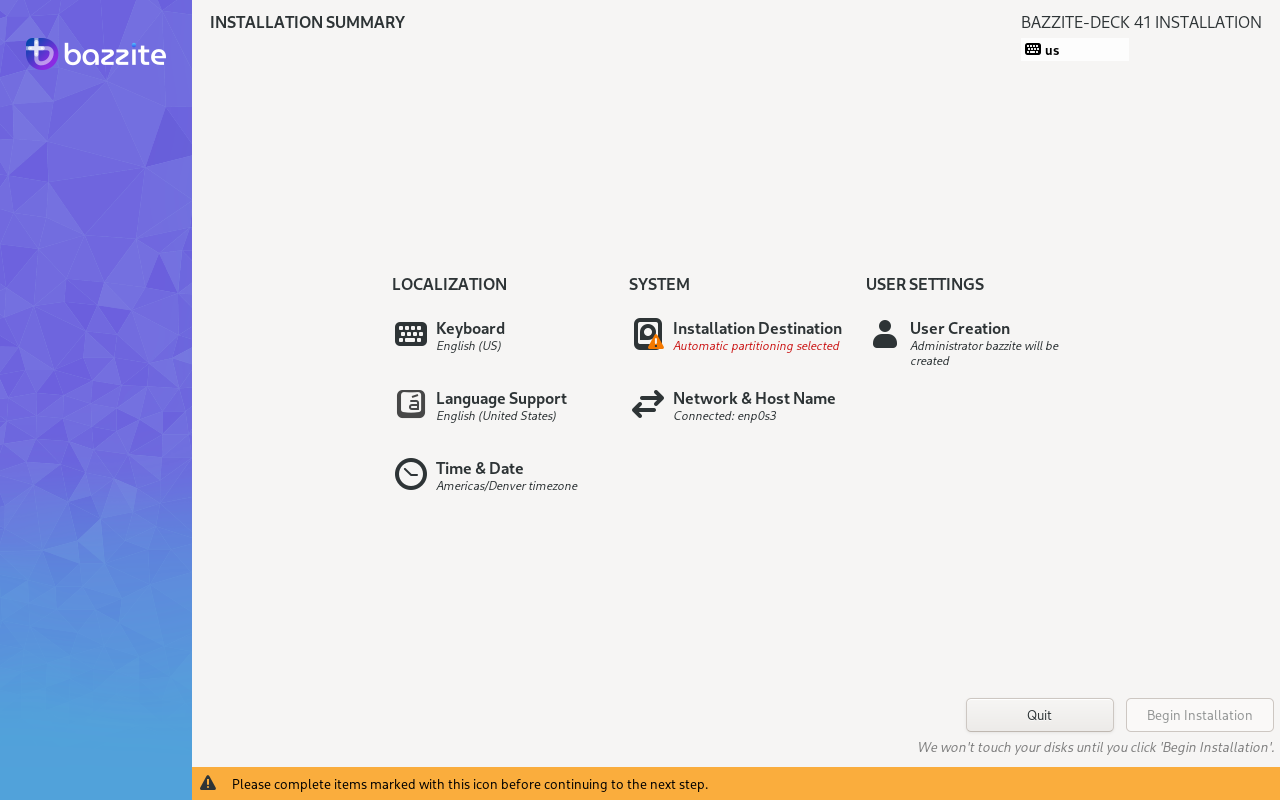
The most important thing here is Installation Destination. Click that, click the drive you want to install Bazzite on, click Free up space by removing or shrinking existing partitions if you want to wipe the existing OS, and then click Done. You’ll then be prompted to choose which partitions you want to keep or delete, which you can click Delete all → Reclaim space if you’re once again ok with wiping the existing OS.
Important
If you want to use more than one drive, for example to have a separate hard drive to store less IO-intensive games, I would recommend not selecting any more here because this will set up all those drives as one big virtual drive. You can set up additional drives in the Steam big picture UI later and this gives you more control over where game files end up, e.g. if you want to install some on the SSD vs. some on a separate hard drive. (Also don’t attempt to manually set up a partition scheme here… I had issues getting it to install when I did that -_-)
After that’s done, you can configure other things like time zone, network connection, and the user that will be created. The user creation menu is the most important since you can easily change everything else after installation except for that. The defaults are bazzite as the username and password and if you’re ok with that, you can ignore it too and click Begin Installation.
Now it’s just a matter of waiting til it finishes! Once it’s done you can click Reboot system and once your computer reboots, you will go right into the Steam big picture UI if you enabled Steam gaming mode when downloading the iso.
Setting Up Bazzite
If all you’re interested in is gaming on Steam… you’re pretty much already done! If you choose gaming mode, Bazzite starts up at a Steam login screen just like the Steam Deck:
You can use the keyboard and mouse to navigate the UI, or you can plug in a controller at this point and use it. If you have problems using your controller like I did with my fight stick, it might be too generic for Steam to apply a default layout to it and you’ll have to set up the inputs yourself. You can click Steam in the bottom left corner, then go to Settings → Controller → Begin Setup and follow the instructions.
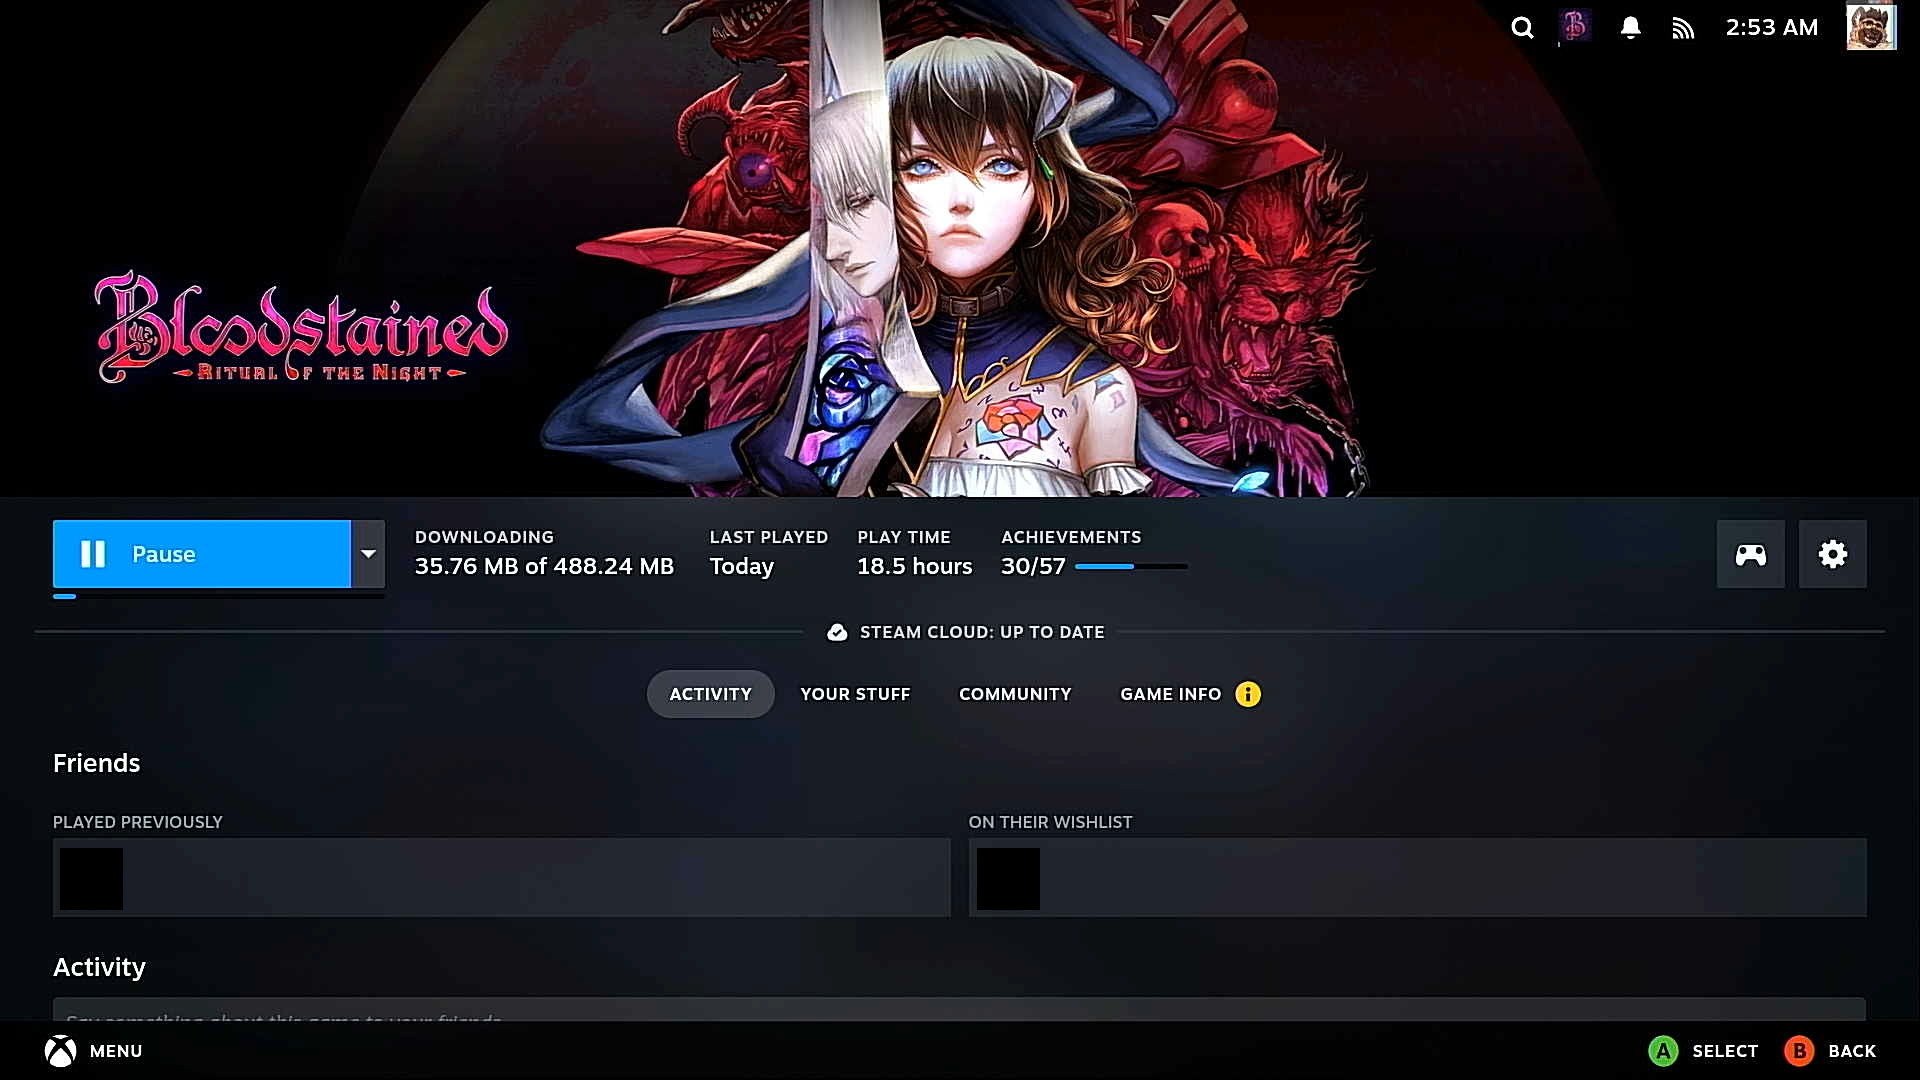
Besides that, the setup process is extremely straightforward and just like the Steam Deck, and installing and running games is all exactly like it too:
I think that’s all I really need to cover on Steam games, since running them is so easy and just like running them on the Steam Deck. I’m going to call out some other things here that I think are worth checking: game performance tuning, running non-Steam games, and using the desktop. (Most of these are actually good tips for the Steam Deck with SteamOS too!)
Extra Bazzite Setup & Using the Desktop
Even though Bazzite sends you directly to big picture when you install in gaming mode, there is actually some extra setup you can and should do on the desktop. If you want to use your controller on the desktop like the Steam Deck, you should first press home/guide button or click Steam in the bottom left corner (I will refer to this as just pressing the Steam button from here on out), go to Settings → Controller → Non-Game Controller Layouts → Desktop Layout → Edit. Choose Official Layout for Desktop Configuration and press X or click Apply Layout, and then you’re all set!
Now press the Steam button and (perhaps a bit unintuitively) navigate to Power → Switch to Desktop:

You will be sent to the KDE desktop with a Bazzite setup window front and center. It’s also straightforward and includes options to install a lot of optional things:
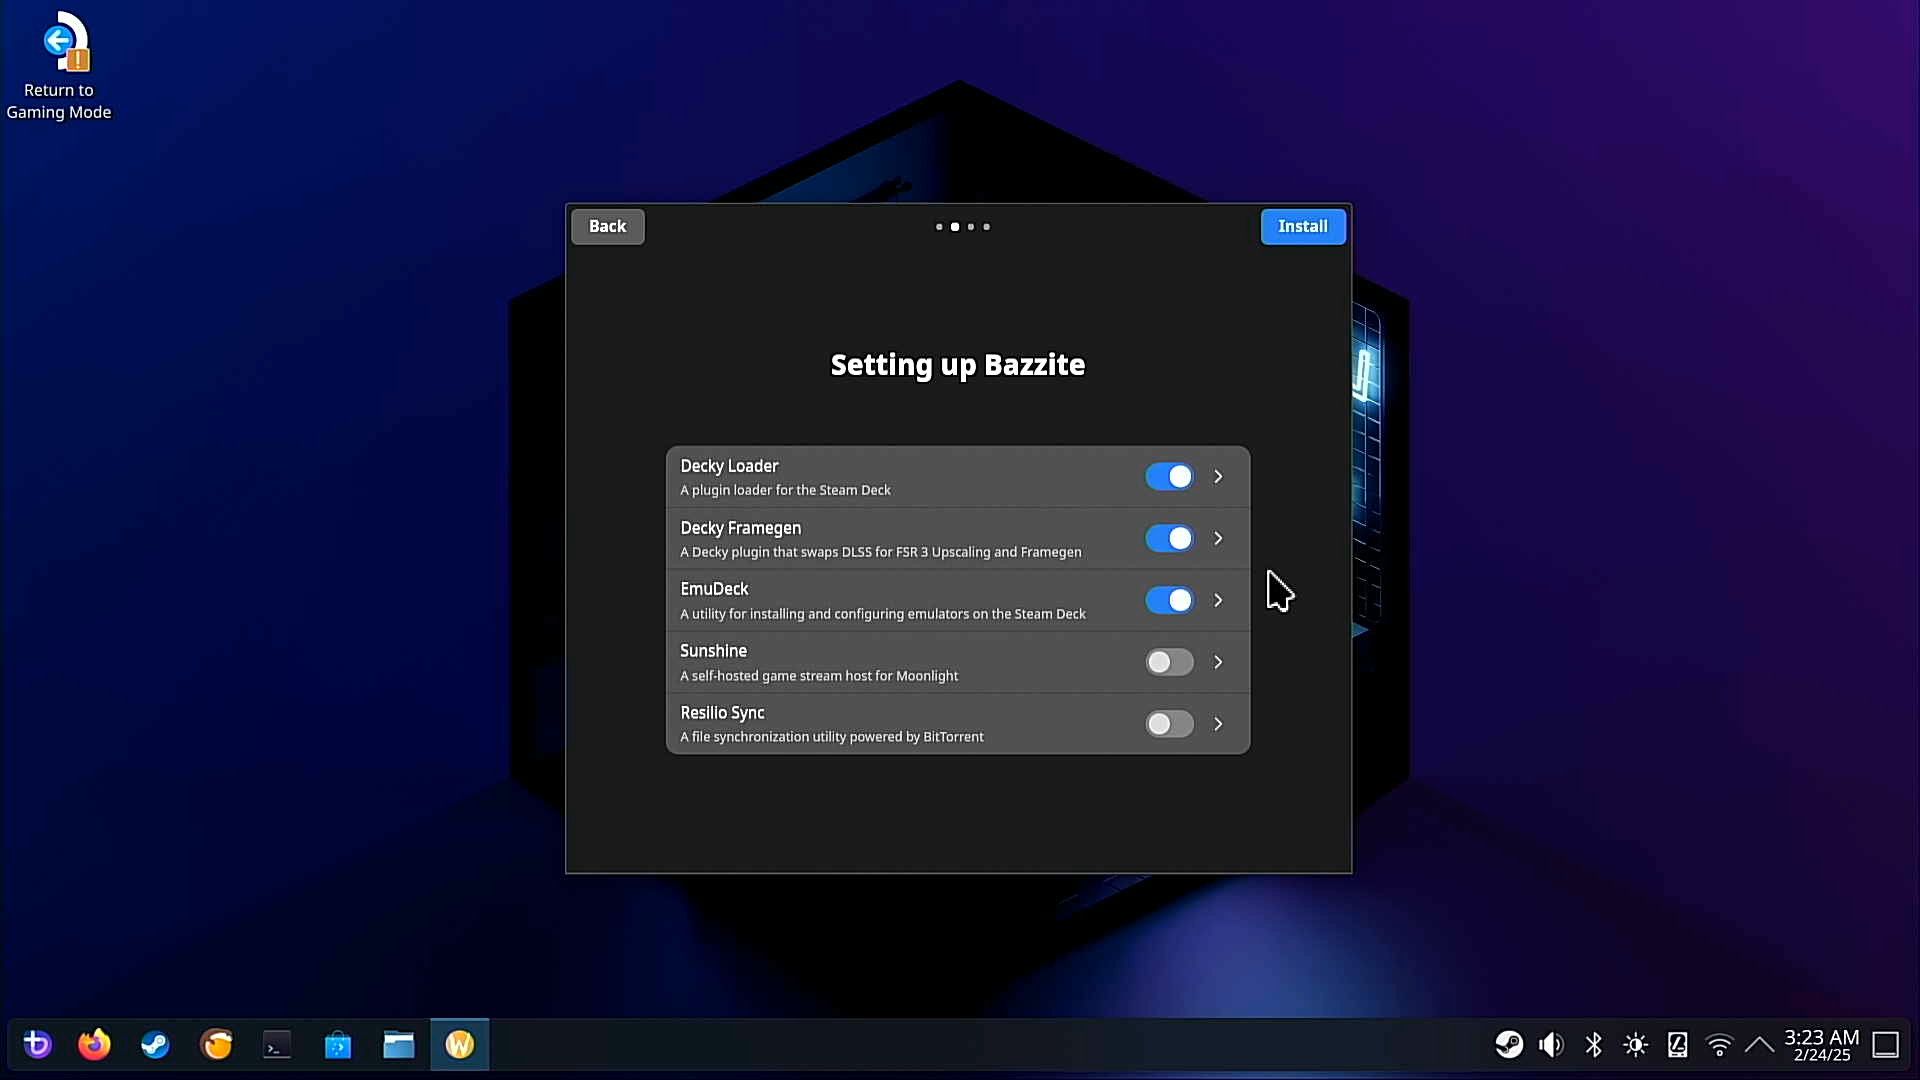
For this guide, I am installing EmuDeck, an easy way to set up retro game emulation (which also integrates these games into your Steam library!). Of course, if you see a thing you think you will want, feel free to install it here too! I like OpenRGB in particular because it lets you configure RGB lighting on Linux which device manufacturers refuse to write drivers for. YMMV but it’s worked wonders for me on both MSI and ASUS motherboards.
Once you finish all of that, you should reboot to finish setup. You can then stay in big picture when you reboot or go back to the desktop.
Note
During this first setup bit, you will likely get a popup saying to set up kdewallet. The option that will give the least headache here is to choose the classic blowfish encrypted file option and set some password for it you’ll remember. Then, when you get a popup to put in your credentials, use the password
bazziteif you didn’t set up a user yourself during the initial Bazzite installation.
EmuDeck
Once you finish the extra setup, if you chose to install EmuDeck, you will get a new icon on the desktop that says Install EmuDeck. Double click it to start the installer.
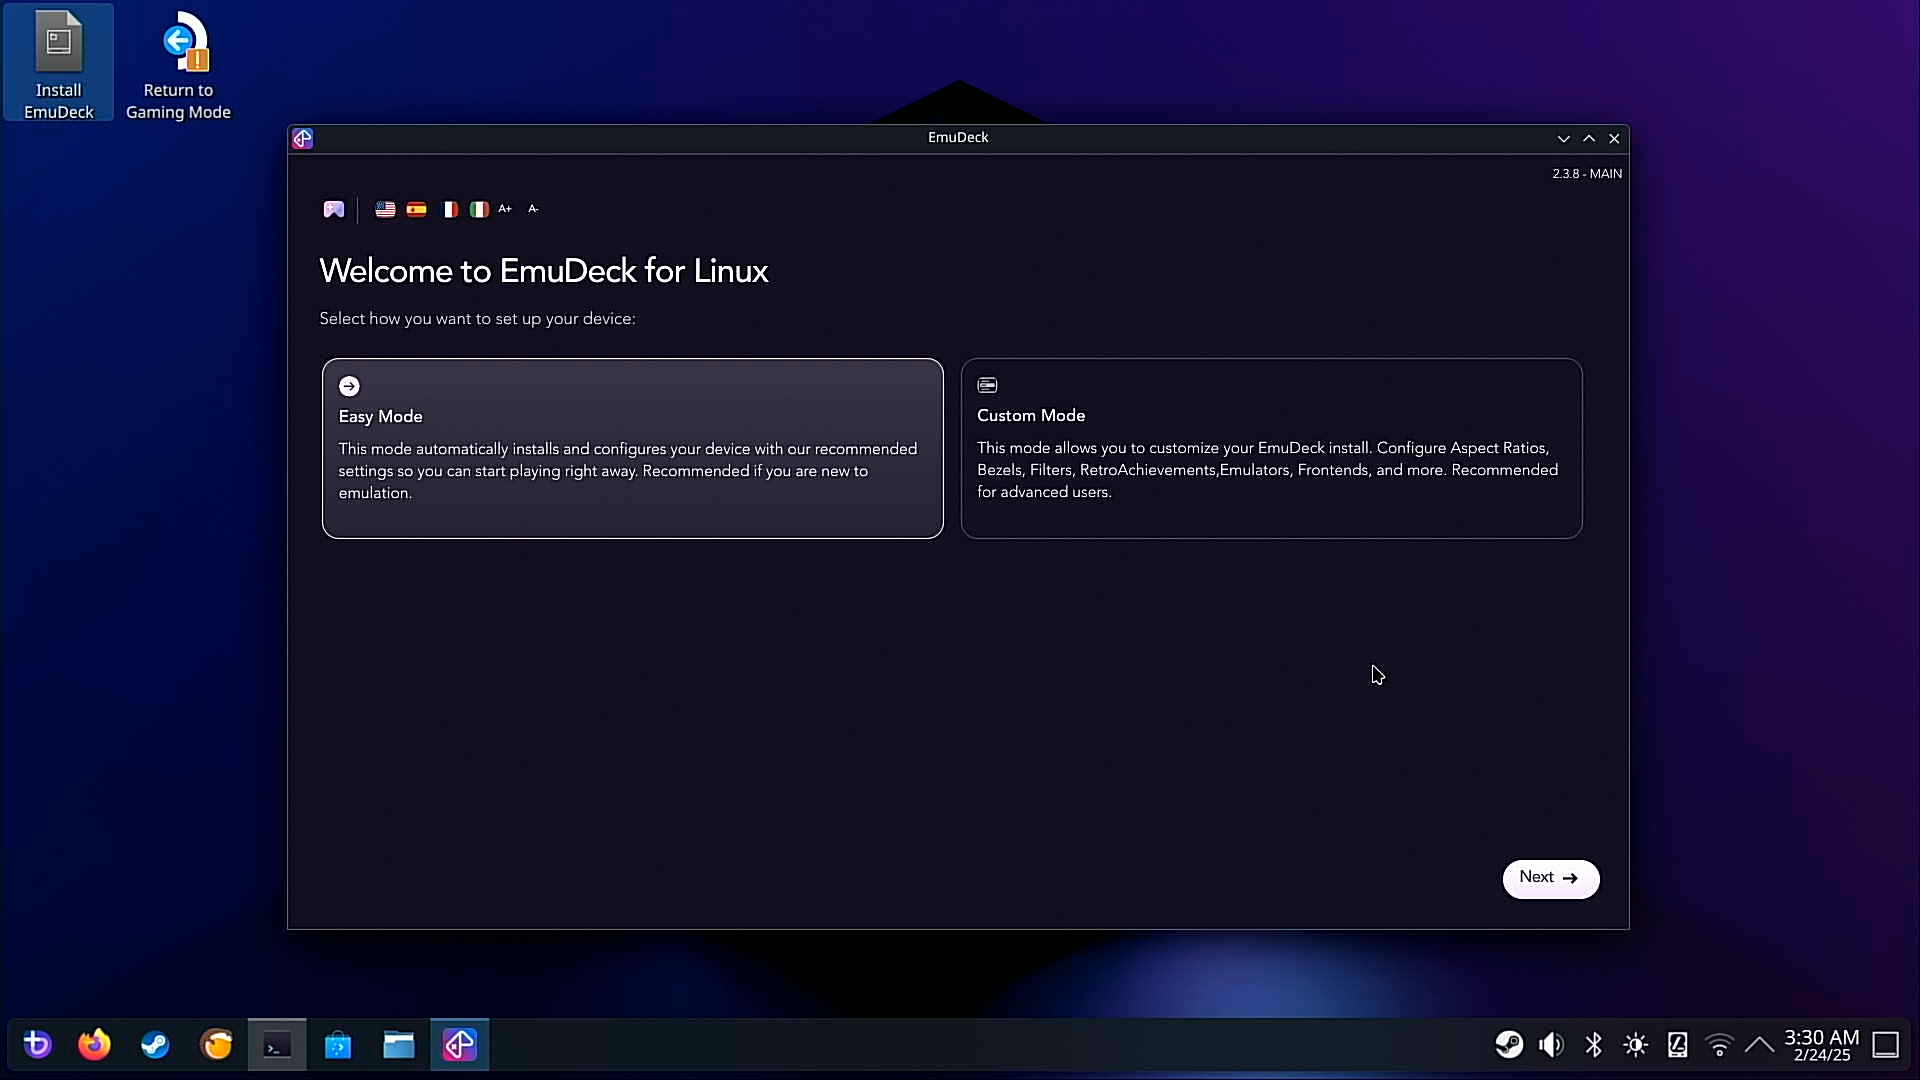
The EmuDeck setup is, once again, super straightforward, just follow the instructions and you will be all set! You can copy in your legally acquired roms/isos into the Emulation folder that pops up during the install process, and the installer guides you through getting those to show up in your Steam library or Emulation Station. To sum up what you need to do (if adding games to your Steam library), you add games to the console’s folder in the Emulation folder under the home directory, then add them in Steam ROM Manager.
Video Streaming Services
You can actually use EmuDeck to add some video streaming services to the Steam big picture interface too! If you look on the sidebar when you open EmuDeck, you’ll find a section that says Cloud Services. Click that and you can add various streaming services. Once you do that, you add them in Steam ROM Manager just like with your roms/isos and that’s it!
The only con here is that most of these will take you to the desktop interfaces, and don’t default to giving you mouse controls to navigate the sites. To fix this, you can go into the controller options and set the controller scheme to Keyboard (WASD) and Mouse, which controls somewhat similarly to the Desktop Configuration layout from earlier. When you need keyboard controls, just press Steam + X and a keyboard will pop up. It’s a bit clunky, but works well enough for a home theater setup imo.
Non-Steam Games
There are a couple of options to run non-Steam PC games on this…
Lutris
Bazzite comes with Lutris preinstalled, which is a common tool to run non-Steam games and launchers. It’s the easier of the two options especially since it integrates with non-Steam storefronts like GOG, EGS, itch.io, and more. Plus, you can easily create Steam shortcuts from it.
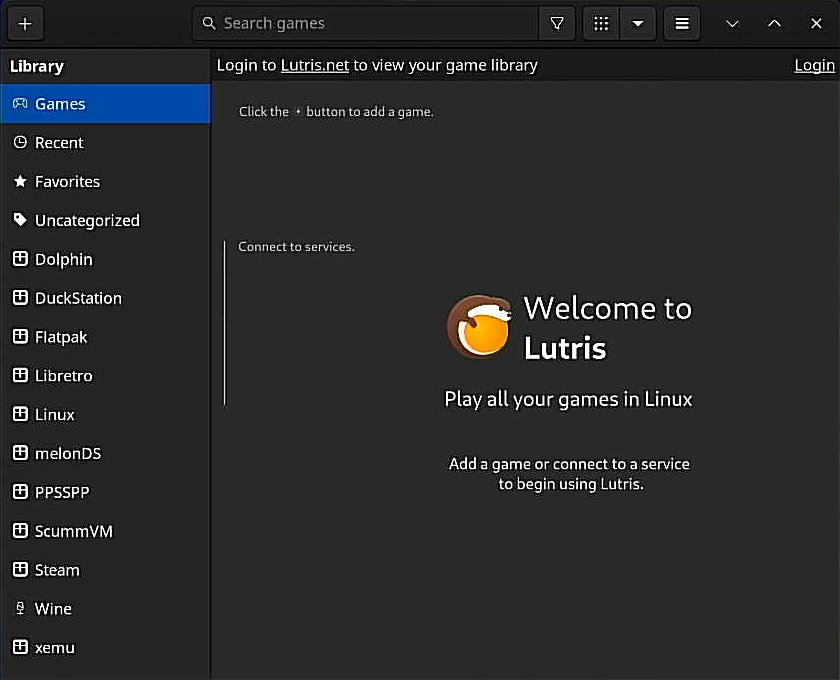
Enabling an integration is pretty easy. Just go to the hamburger menu → Preferences → Sources and toggle the storefronts you want to use. Then exit out and you will see the source in the sidebar with a person icon that says Connect when you hover over it. Click that and it will guide you through logging in, and then Lutris will show you all the games you have for that account.
To install games, all you need to do is double click the game and it will guide you through installing it. You can also set it to add a Steam shortcut from the installation process, or right click the game later and click Create Steam shortcut.
Games outside of these storefronts can be added by clicking the plus icon in the upper left corner, including from game installers.
Btw, if you want to play Windows games through Lutris, make sure you go back to Preferences, then Updates and click Download wine-ge-{version-number}.
Steam
Yes, you can use Steam itself to run non-Steam games! It’s a bit of a pain though, since you have to manually add a non-Steam game and then set it to run a version of Proton. I only really recommend this for one-off games since Lutris makes things way easier for alternative storefronts. The process looks like this:
- Open Steam on the desktop and click Add a Game in the bottom left corner → Add a Non-Steam Game….
- Click Browse… if your game doesn’t show up in the list and select your game’s executable.
- If you added it like in the last step, the game will be checked. If you found the game in the list already, click the check.
- Click Add Selected Programs and it will be added to your Steam library for use in gaming mode!
- If it’s a Windows game, you have to do one more thing: right click the game in your Steam library, click Properties → Compatibility, check Force the use of a specific Steam Play compatibility tool, and choose a Proton version. (If you’re unsure which one to pick, the highest numbered Proton version is a good bet.)
Then you can play the game through your Steam library like any other game!
Performance Options
If you’ve used the Steam Deck, you’re probably aware that if you press the 3 dots button, you can access quick settings including a bunch of performance tuning options:

This is a thing in Bazzite too! If you’re on the desktop, go back into gaming mode. When in gaming mode, press the Steam + A buttons at the same time and that will open up the quick settings menu. There are many quick settings options here, but the lightning symbol shows a bunch of performance options if you press A on Advanced View, as you can see above.
These are particularly useful if you have an underpowered GPU. If you’re struggling to play a game at a good framerate and it doesn’t have FSR built-in, you can set the game to a lower resolution and then just set the scaling filter to FSR in the performance settings! Gamescope is the underlying thing that does this and is one of the things I really like about gaming on Linux. (I guess you have Lossless Scaling or Magpie on Windows, but having it baked into Steam gaming mode is nice.)
What Games are Compatible?
Now, the last important thing to talk about is game compatibility. While it’s so much better than it used to be, it’s still not perfect. If you already have games in your Steam library, it’s worth just firing up the game and seeing how it runs before tinkering, but if you’re contemplating whether to buy a game and your decision hinges on whether it runs on Linux or not, it’s a good idea to check ProtonDB, and for multiplayer games with anti-cheat you can check Are We Anti-Cheat Yet?.

Many games run just fine without doing anything, but others you will have to do some tinkering to get running like you would expect them to. Such is the Linux experience, but luckily most tweaks just involve adding some command line arguments, or adding community patches like you would have to do to those problematic games in Windows anyways.
And I’m gonna call it for this! There’s more I could go over, but I think it’s best to just try it out and see for yourself how nice Linux gaming has become! If you run into issues, feel free to DM me and I can do my best to help :3